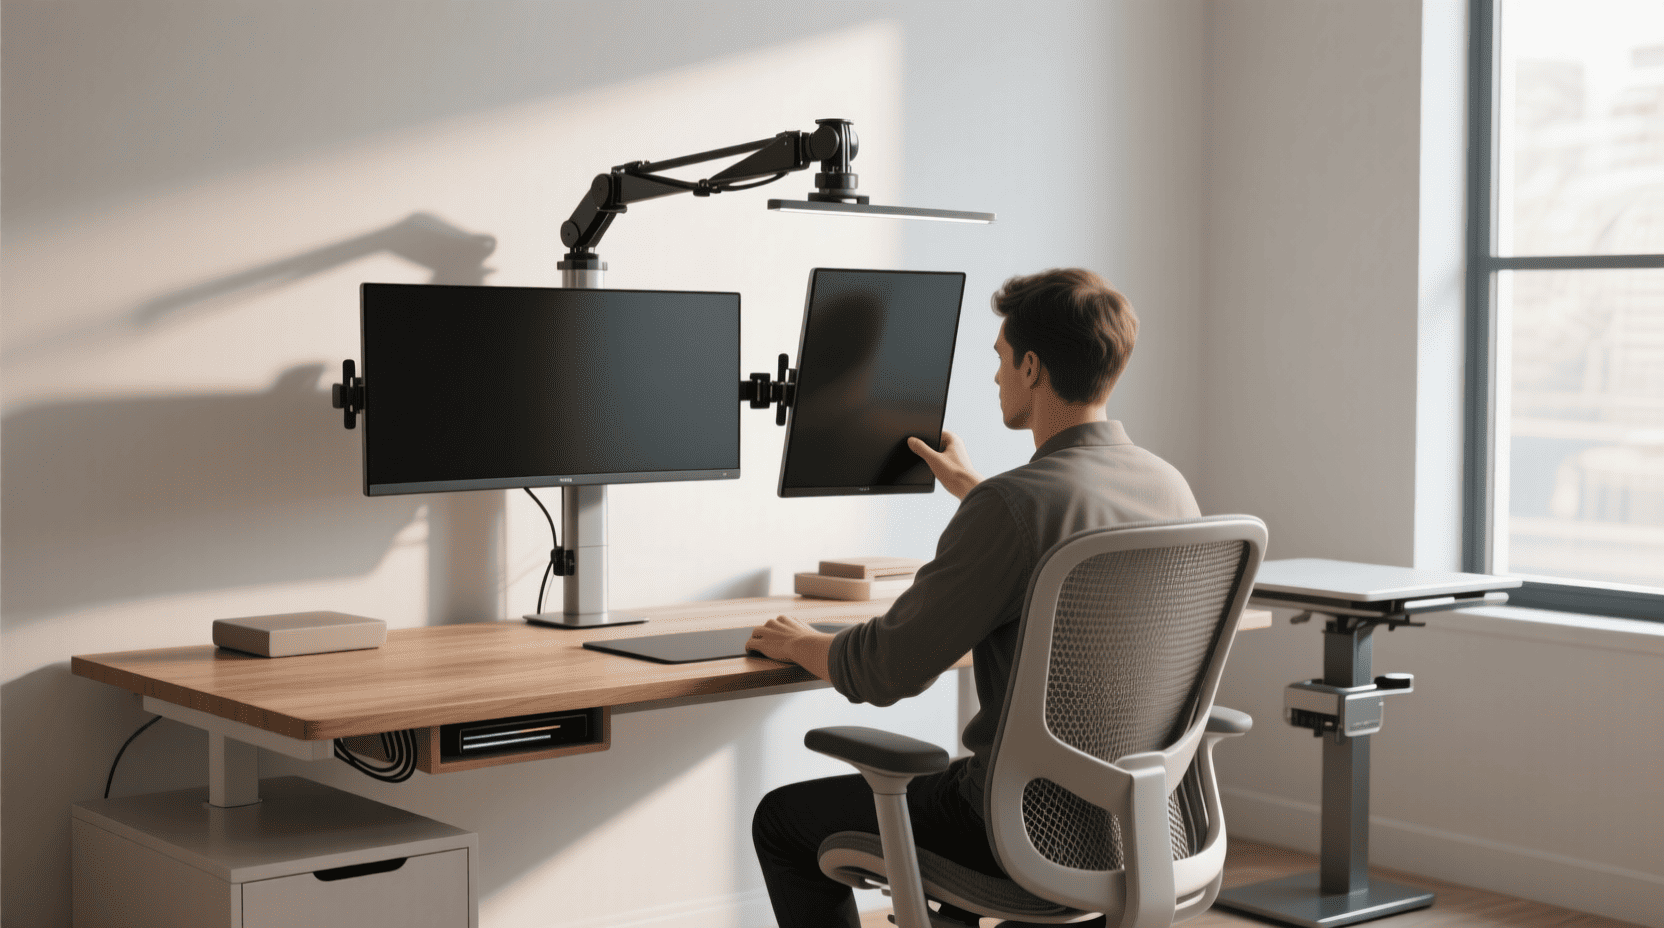
Monitor arm installation involves choosing between clamp or grommet mounting, positioning the screen 18-28 inches from your eyes at eye level with a slight 10-20 degree downward tilt. Proper ergonomic placement reduces neck strain and improves productivity by creating the optimal viewing angle.
Before starting, we’ve got some other related setups articles about home office setups, take a look:
Quick Tips for Perfect Monitor Arm Setup
Setting up your monitor arm correctly can transform your workspace from a productivity killer into an ergonomic powerhouse. Whether you’re a remote worker battling neck strain or a content creator seeking the perfect viewing angle, proper monitor arm installation is crucial for your health and efficiency.
The key to successful monitor arm installation lies in understanding both the technical mounting process and the ergonomic principles that make your setup work for your body. Most people make critical mistakes during installation that lead to poor posture, eye strain, and decreased productivity. This comprehensive guide will walk you through every step of the process, from selecting the right mounting method to achieving the perfect ergonomic positioning.
A well-installed monitor arm doesn’t just hold your screen – it becomes an adjustable foundation that adapts to your changing needs throughout the day. Whether you’re switching between sitting and standing positions or adjusting for different tasks, your monitor arm should move with you seamlessly.
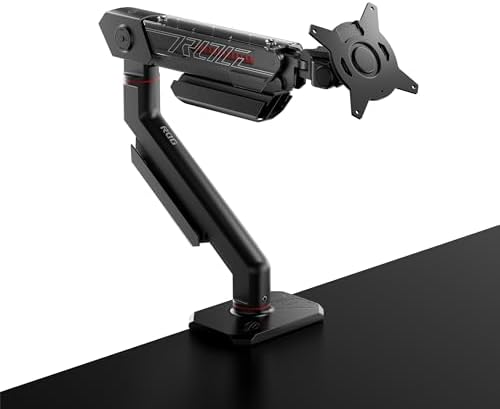
Understanding Monitor Arm Mounting Options
Clamp Mount Installation
Clamp mounts represent the most popular choice for monitor arm installation due to their versatility and ease of setup. These mounts attach to the edge of your desk without requiring any permanent modifications to your workspace.
The installation process begins with assessing your desk thickness and edge clearance. Most clamp mounts accommodate desk thicknesses between 0.5 to 4 inches, making them suitable for the majority of office furniture. The clamp mechanism consists of two plates that sandwich your desk edge, with a threaded rod providing the compression force.
Position the clamp mount at the rear edge of your desk, ensuring there’s adequate clearance for the arm’s movement range. Tighten the clamp gradually, checking that the pressure is distributed evenly across the desk surface. Over-tightening can damage your desk, while insufficient pressure may compromise stability.
The primary advantage of clamp mounts is their portability – you can easily relocate them between different workstations or remove them entirely when needed. They’re particularly beneficial for rental spaces or shared work environments where permanent modifications aren’t permitted.
Grommet Mount Installation
Grommet mounts offer a more permanent and aesthetically pleasing solution for monitor arm installation. This method involves drilling a hole through your desk surface, typically 80mm in diameter, through which the mounting post passes.
The installation begins with careful measurement and marking of the hole location. Position the grommet mount away from desk edges to ensure structural integrity – typically at least 6 inches from any edge. Use a hole saw attachment on your drill for clean, precise cuts through the desk material.
Once the hole is prepared, the grommet mount consists of three main components: the desktop plate that sits on your work surface, the mounting post that passes through the hole, and the securing plate that fastens underneath. Thread the bolt through all components and tighten gradually to ensure even pressure distribution.
Grommet mounts provide superior stability compared to clamp mounts, especially for larger or multiple monitor setups. They also create a cleaner appearance by routing cables through the mounting hole, reducing desktop clutter significantly.

Essential Tools and Preparation
Required Installation Tools
Successful monitor arm installation requires specific tools and careful preparation. For clamp mount installation, you’ll need basic tools including an adjustable wrench, screwdriver set, and measuring tape. Grommet installations additionally require a drill with an 80mm hole saw attachment, safety glasses, and a dust mask.
Prepare your workspace by clearing the desk area and protecting surrounding surfaces with drop cloths. Having adequate lighting is crucial for precise measurements and safe installation. Keep your monitor’s manual handy to verify VESA mounting pattern compatibility and weight specifications.
Create a systematic approach by laying out all hardware components and identifying each piece according to the installation manual. Many installation failures result from using incorrect hardware or skipping critical steps due to inadequate preparation.
Desk Compatibility Assessment
Before beginning installation, thoroughly assess your desk’s compatibility with your chosen mounting method. Measure desk thickness at multiple points, as some desks feature varying thicknesses or internal structures that may affect mounting.
Check for internal desk components like cable management trays, keyboard slides, or structural supports that might interfere with mounting hardware. Glass desks require special consideration and often need protective pads to prevent cracking during clamp installation.
Evaluate your desk’s load-bearing capacity, particularly for multiple monitor setups. Most modern desks can support standard monitor arms, but older or lightweight furniture may require reinforcement or alternative mounting solutions.
Step-by-Step Installation Process
Pre-Installation Setup
Begin your monitor arm installation by removing your monitor from its existing stand and carefully placing it in a safe location. Document your current cable connections with photos to simplify reconnection later. Clear your entire workspace and ensure adequate room for maneuvering during installation.
Unpack your monitor arm completely and verify all components against the included parts list. Check for any shipping damage and test moving joints to ensure smooth operation before beginning installation. Read through the entire manual to understand the complete process and identify any special requirements for your specific model.
Mounting the Base
For clamp mount installation, position the base clamp at your desired location along the desk edge. The optimal position is typically centered behind your primary work area, allowing maximum adjustment range for screen positioning. Ensure the clamp plates are clean and properly aligned before tightening.
Apply steady, even pressure when tightening the clamp mechanism. Many users make the mistake of over-tightening, which can damage the desk surface or strip the threading. Tighten until the mount feels secure but still allows slight movement if necessary.
Grommet mount installation requires more precision in base positioning. After drilling your mounting hole, clean away all debris to prevent interference with the mounting hardware. The base plate should sit flush against the desk surface with the mounting post passing through without binding.
Attaching the Monitor
Monitor attachment represents the most critical phase of installation, requiring careful attention to VESA mounting patterns and weight distribution. Most monitors use standard VESA patterns (75x75mm, 100x100mm, or 200x200mm), but verify your specific monitor’s requirements before proceeding.
Attach the VESA mounting plate to your monitor using the provided screws, ensuring they’re the correct length for your monitor’s mounting points. Over-length screws can damage internal components, while under-length screws may not provide adequate security.
When connecting the monitor to the arm, support the monitor’s weight manually until the connection is fully secured. Test the mounting security by gently attempting to move the monitor – any looseness indicates incomplete installation that must be corrected before use.
Achieving Perfect Ergonomic Placement
Optimal Screen Distance and Height
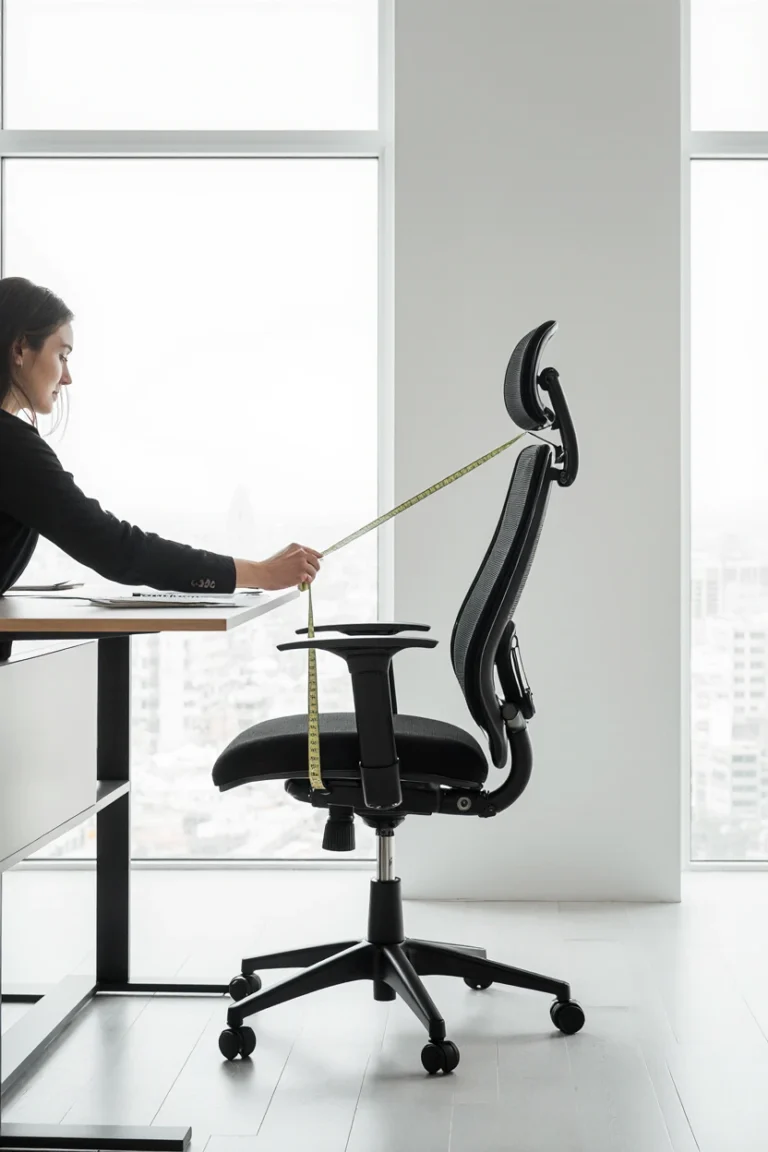
Proper ergonomic monitor placement begins with establishing the correct viewing distance and height relationship. Your monitor should be positioned 18-28 inches from your eyes, roughly equivalent to an arm’s length when seated in your normal working position.
The top of your monitor screen should align with or sit slightly below eye level when you’re looking straight ahead. This positioning allows your eyes to naturally look slightly downward at the screen, reducing neck strain and promoting better posture throughout your workday.
For users wearing bifocal or progressive lenses, slight adjustments may be necessary to accommodate the different lens zones. The screen may need to be positioned slightly lower to utilize the intermediate or reading portions of your lenses effectively.
Screen Angle and Tilt Adjustment
Monitor tilt plays a crucial role in reducing glare and optimizing viewing comfort. The ideal screen tilt is typically 10-20 degrees backward from vertical, creating a perpendicular viewing angle that minimizes neck flexion and eye strain.
Adjust the tilt angle based on your specific seating position and screen height. If your monitor is positioned higher than eye level, increase the backward tilt to maintain a comfortable viewing angle. Conversely, monitors positioned below eye level may require less tilt or even a slight forward angle.
Consider your room’s lighting conditions when setting screen angle. Windows, overhead lighting, and desk lamps can create reflections that interfere with screen visibility. Proper tilt adjustment often eliminates these reflections without requiring additional lighting modifications.
Dual Monitor Positioning Strategies
Dual monitor setups require additional consideration for optimal ergonomic placement. The primary monitor should be positioned directly in front of you, with the secondary monitor angled 30-45 degrees to reduce neck rotation when switching between screens.
Both monitors should maintain consistent height and distance relationships to your seating position. Avoid significant height differences between screens, as this forces your eyes to constantly readjust focus and can lead to eye fatigue and headaches.
For users who spend equal time on both monitors, consider positioning them symmetrically with a slight inward angle. This configuration creates a natural viewing arc that minimizes head movement while maintaining comfortable sight lines to both screens.
Common Installation Mistakes to Avoid
Mounting Hardware Errors
One of the most frequent monitor arm installation mistakes involves using incorrect mounting hardware. Each monitor requires specific screw lengths and thread types for VESA mounting – using wrong hardware can damage your monitor or create an insecure connection.
Always verify screw length against your monitor’s mounting depth. Most monitors include spacers or provide depth specifications in their documentation. When in doubt, start with shorter screws and add spacers as needed rather than risking damage from over-length hardware.
Avoid mixing hardware from different manufacturers or monitor arm models. While screws may appear similar, subtle differences in thread pitch or head design can compromise the connection security or damage mounting threads.
Positioning and Adjustment Mistakes
Many users position their monitor arms too close to desk edges, limiting adjustment range and potentially creating stability issues. Place your monitor arm base at least 6 inches from any desk edge to ensure full articulation without obstruction.
Over-tightening adjustment joints is another common error that can damage the arm mechanism or make future adjustments difficult. Most monitor arms use gas spring or friction-based adjustment systems that require only moderate tension to maintain position.
Failing to account for cable management during positioning often results in tangled or strained cables that limit monitor movement. Plan cable routing before finalizing monitor position to ensure adequate slack for all adjustment ranges.
Cable Management and Organization
Routing Strategies
Effective cable management is essential for both aesthetics and functionality in monitor arm installations. Plan your cable routing before finalizing monitor placement to ensure adequate length and prevent strain on connections.
Most monitor arms include built-in cable management features such as clips, channels, or routing holes. Utilize these features to keep cables organized and prevent tangling during monitor adjustments. Group cables by function – power, video, and USB cables should be routed separately when possible.
Consider cable length requirements for your full range of monitor movement. Cables should have adequate slack at both the monitor and base connections to accommodate all adjustment positions without creating strain or disconnection risks.
Maintaining Clean Aesthetics
Cable management significantly impacts your workspace’s visual appeal and professional appearance. Use cable ties or velcro straps to bundle loose cables, but avoid over-tightening that could damage cable insulation or create stress points.
Hide cables whenever possible by routing them behind the monitor arm structure or through desk cable management systems. This approach creates a cleaner appearance and reduces visual distractions in your workspace.
Regular cable maintenance prevents tangles and ensures continued functionality. Periodically check cable routing and adjust as needed, especially after making significant changes to monitor positioning or adding new equipment to your setup.
Troubleshooting Common Issues
Stability and Movement Problems
Monitor arm stability issues often stem from improper installation or adjustment. If your monitor drifts or won’t maintain position, check all mounting hardware for tightness and verify that adjustment mechanisms are properly tensioned.
Gas spring monitor arms may require tension adjustment to accommodate different monitor weights. Most arms include adjustment mechanisms that allow fine-tuning of the spring tension to achieve perfect balance for your specific monitor.
Excessive movement or wobbling typically indicates loose mounting hardware or inadequate desk support. Re-check all connection points and consider reinforcing thin or flexible desk surfaces that may not provide adequate stability.
Height and Angle Adjustment Difficulties
Difficulty adjusting monitor height or angle often results from over-tightened joint mechanisms or incorrect spring tension settings. Consult your monitor arm’s manual for proper adjustment procedures – many arms require loosening tension before making position changes.
Some monitor arms feature separate locks for different adjustment axes. Ensure you’re adjusting the correct mechanism for your desired movement, and verify that all locks are properly disengaged before attempting position changes.
If adjustment mechanisms become stiff or difficult to operate, light lubrication with appropriate lubricants may restore smooth operation. Avoid using heavy oils or greases that can attract dust and debris over time.
Advanced Placement Techniques
Multi-Monitor Configurations
Advanced multi-monitor setups require careful planning to maintain ergonomic principles while maximizing screen real estate. Three-monitor configurations work best with a primary center monitor flanked by two secondary screens angled inward at approximately 30 degrees.
Vertical monitor orientations, popular for coding and document review, require special consideration for neck positioning. Ensure that vertically oriented monitors don’t force excessive upward head tilt, which can lead to neck strain and fatigue.
Consider monitor bezel thickness when positioning multiple screens. Minimize gaps between screens to create a more seamless viewing experience, but ensure adequate clearance for proper heat dissipation and cable routing.
Specialty Setups and Configurations
Ultra-wide monitors require different positioning strategies compared to standard aspect ratio screens. These monitors should be positioned slightly farther from your seating position – typically 24-32 inches – to maintain comfortable viewing of content across the entire screen width.
Curved monitors offer natural ergonomic benefits but require careful positioning to maximize these advantages. The optimal viewing distance for curved monitors is typically closer than flat panels, around 20-24 inches, depending on the curve radius.
Gaming setups may benefit from slightly different positioning strategies that prioritize immersive viewing angles over traditional ergonomic guidelines. However, maintain reasonable limits to prevent long-term health issues from prolonged gaming sessions.
Maintenance and Long-term Care
Regular Adjustment and Cleaning
Monitor arms require periodic maintenance to ensure continued smooth operation and longevity. Clean adjustment mechanisms monthly using appropriate cleaners and light brushes to remove dust and debris that can impair movement.
Inspect mounting hardware quarterly for signs of loosening or wear. Tighten connections as needed, but avoid over-tightening that can damage threads or mounting surfaces. Replace any worn or damaged hardware promptly to maintain installation security.
Lubricate moving joints annually or as recommended by the manufacturer. Use only specified lubricants to avoid damaging seals or attracting excessive dust buildup that can impair operation.
Adapting to Changing Needs
Your monitor arm setup should evolve with your changing work requirements and physical needs. Regularly assess your positioning and make adjustments to maintain optimal ergonomics as your work habits or physical condition changes.
Document your preferred settings for different tasks or times of day. Many users benefit from slightly different monitor positions for focused work versus video conferencing, and having documented settings makes quick adjustments easier.
Consider upgrading or modifying your monitor arm setup as your needs change. Adding monitor arms, changing mounting methods, or upgrading to more flexible systems can extend the useful life of your workspace investment.
Conclusion
Proper monitor arm installation and placement represents one of the most impactful upgrades you can make to your workspace. The investment in time and effort pays dividends through reduced physical strain, increased productivity, and improved work comfort that lasts throughout your career.
The key to success lies in understanding both the technical installation requirements and the ergonomic principles that make your setup work for your specific needs. By following the comprehensive guidelines outlined in this guide, you’ll create a workspace that adapts to your changing requirements while supporting your long-term health and productivity.
Remember that monitor arm installation is not a one-time setup but an ongoing process of refinement and adjustment. As your work habits evolve and your physical needs change, your monitor positioning should adapt accordingly. Regular assessment and minor adjustments ensure that your workspace continues to serve you effectively.
Take action today by evaluating your current monitor setup and identifying areas for improvement. Whether you’re dealing with neck strain from poor positioning or simply want to optimize your workspace efficiency, proper monitor arm installation provides the foundation for a healthier, more productive work environment.
For additional workspace optimization tips, explore our comprehensive guides on ergonomic workstation setups and cable management organization. Your journey toward the perfect workspace continues with each improvement you make.
Frequently Asked Questions
Q: What’s the difference between clamp and grommet monitor arm mounts? A: Clamp mounts attach to your desk edge without drilling and offer easy repositioning, while grommet mounts require a drilled hole but provide superior stability and cleaner cable management. Choose clamp mounts for flexibility and grommet mounts for permanent, multiple-monitor setups.
Q: How far should my monitor be from my eyes for optimal ergonomics? A: Position your monitor 18-28 inches from your eyes, roughly equivalent to arm’s length when seated. This distance reduces eye strain and allows comfortable focus without requiring excessive eye movement to view the entire screen.
Q: Can I install a monitor arm on any desk? A: Most desks accommodate monitor arms, but check your desk thickness (should be 0.5-4 inches for clamp mounts) and ensure adequate structural support. Glass desks need protective pads, and very thin or lightweight desks may require reinforcement for heavier monitor setups.
Q: What monitor angle is best for reducing neck strain? A: Tilt your monitor 10-20 degrees backward from vertical, allowing your eyes to look slightly downward at the screen. This angle reduces neck flexion and supports natural head positioning while minimizing glare from overhead lighting.
Q: How do I know if my monitor arm is properly tensioned? A: A properly tensioned monitor arm should hold your monitor in any position without drifting or requiring excessive force to adjust. The monitor should move smoothly when you apply gentle pressure and remain stable when released, indicating correct spring tension or friction settings.